Process Learn more about how Chris Combs's artworks are made.
Electronics
Although my artworks may resemble readymade products, they are generally made with custom electronics that I
design and assemble in my studio.
Design
I design circuit boards with special software that lets me draw a schematic and arrange the components in a
blank-canvas way. It's helpful to me to be able to start from scratch, creating circuit boards that exactly
fit the shape and function that I have in mind for a particular piece.
After designing a circuit board, I send its design files to a "board house" for fabrication. It is possible
to make circuit boards from scratch as an individual, but this involves a lot of noxious chemistry and
fiberglass dust; home-milled or etched boards also do not typically meet the same level of quality, in
either form or function.
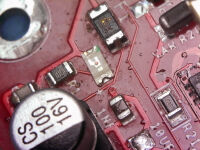
The board itself functions like wires between the individual components (like chips, resistors, and LEDs)
that do all of the fun bits.
The bare circuit boards that I receive from the board house do not have any of the electronic components on
the board that allow it to function.
Assembly
It is possible to order fully-assembled boards, but I prefer to assemble my own. I like the feel of a
hand-assembled board, with minor variations in component placements, like brush strokes in a painting.
To assemble a board, I first use a laser-cut metal stencil or syringe to apply lead-free "solder
paste"—a grey goop made of microscopic balls of solder in a suspension of flux.
Next, I use tweezers to carefully place each of the surface-mount parts on a board. A typical circuit board
contains several dozen parts, but some boards, like my Impressions, have hundreds. Each of the parts must be
placed in particular orientations, and choosing the wrong component from my library of around a hundred
thousand parts or installing one backwards generally keeps it from working.
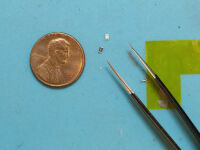
A typical part size for me is "0805," 2.0x1.2mm.
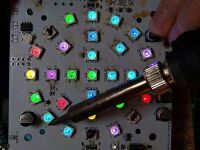
After all of the parts are placed, I solder them on to the boards with either a special oven, a hot air
"rework station," or a board preheater. This melts the solder balls in the solder paste, pulling the
components into place and forming the electrical bonds that cause the circuits to function.
Some parts can't be placed this way, such as "through-hole" parts that need to go through the board to be
anchored on both sides. I assemble these by hand, using a soldering iron and lead-free solder to attach
them.
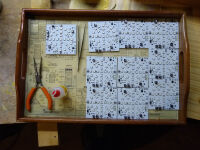
Testing
It is important to ensure that a given artwork will continue to work well once it leaves my studio. A big
part of this is testing a fully-assembled board. Certainly you can plug something in and see if it works.
But it's better to test each part of a board in isolation first.
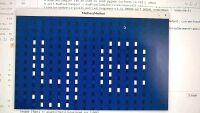
Solder quality: I use a microscope to examine each of the hundreds or thousands of soldered connections on
each circuit board. It is possible to detect many short circuits or missing solder connections this way.
Each of these can be fixed by hand with a soldering iron.
Defective components: ICs (chips) can be tested with dedicated individual connections, ensuring that they're
"talking" to the rest of the board.
Functional testing: I use software running in computers similar to the final artwork's to communicate with
the board and verify that its full systems are working well.
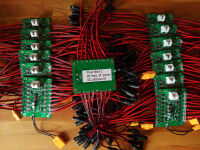
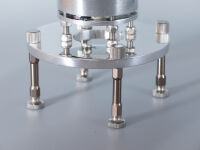
Dedicated testbeds: For multiples and editioned pieces, I may design a dedicated "bed-of-nails"
hardware/software testbed that connects with the board and conducts many of the above tests automatically.
Enclosure and Appearance
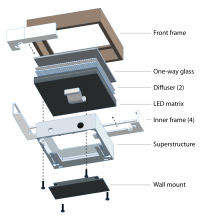
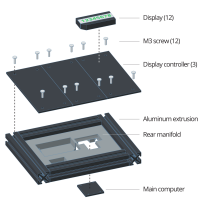
Once all the innards are ready, it's time to put them in a shell. I have a few broad categories of pieces:
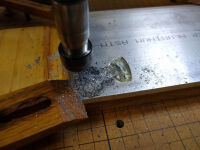
Organic Materials
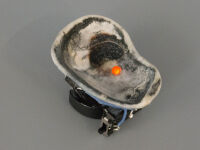
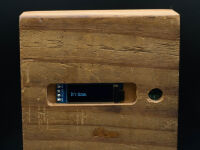
I like to work with wood, seashells, chunks of asphalt, rocks, and other organic forms. Some of these I form
with rasping/filing, shaving, carving, or CNC routing, with a custom-modified CNC router.
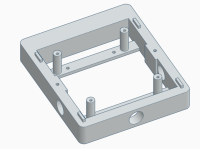
Metal, Industrial Found Objects
Many of my pieces are built with aluminum or steel enclosures, sold for system integrators and small
companies to use in building custom hardware. They tend to come as minimal, rectangular prisms that have
removable lids. I cut and file holes for screens, buttons, or sensors, install internal electronics, and
then finish the boxes with paint, sanding, and other surface finishing techniques.
I also source used industrial enclosures from eBay and other vintage sources, preserving and stabilizing
their exteriors as much as possible.
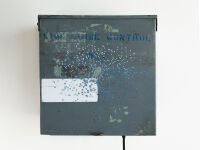
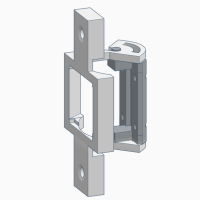
“Side Guide Control”
is an example of this.
“Side Guide Control”
is an example of this.
Circuit Boards as Art

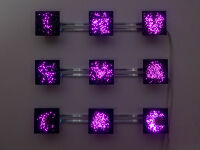
In some of my pieces I like to present the circuit board itself as the main form. They are a bit stark and
unusual in appearance, which I like, and evokes technology right off the bat.
Examples of this are
“Rxsqtta-Stzne”
and
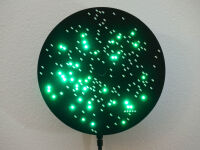 “Impressions”
“Rxsqtta-Stzne”
and
“Impressions”
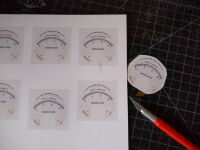
3D Printing
Technologies
Software

I write my own code in C, Python, and Cython.
Most of my recent pieces are built with my custom Cython framework, which breaks out each sensor, renderer, and output to a separate process—adding complexity but helping me get high framerates and smooth responsiveness on the multi-core embedded processors used in my pieces.
Architectures
I generally use AVR and ARM computing environments— similar to, or incorporating, Arduino
microcontrollers and
Raspberry Pi computers.